11 Must-Have RV Necessities From The Faucet to the Poop Tank!
How Does The RV’s Plumbing System Work
Hitting the road in an RV is one of the most fulfilling things that we have ever done as a family. Seeing all of the wonderful sites that America has to offer with your kids is rewarding beyond words.
However, this life does have it challenges and some special education is required to be a successful RV’er. One of the first things that you must learn is how your RV plumbing works.
Unlike your home plumbing system where water magically appears when you open the faucet, and then magically disappears down a drain when you flush, RV plumbing systems require a bit more interaction. Understanding how these systems are built and how they work will help you to keep them in top performing shape.
We have compiled here, the RV plumbing basics that every RV owner should know to maintain a safe and effective plumbing system.
Dual Water Delivery Systems
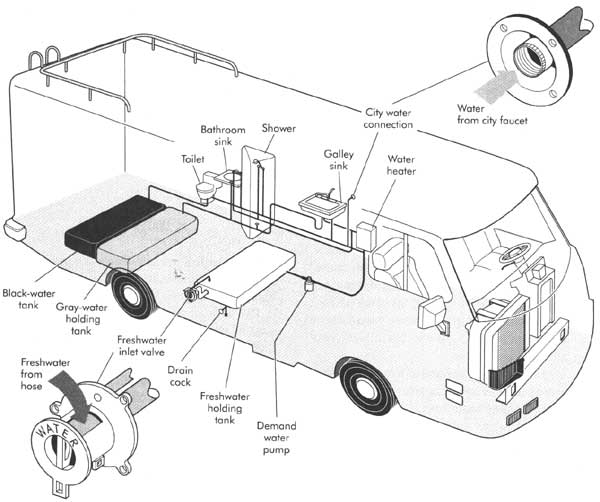
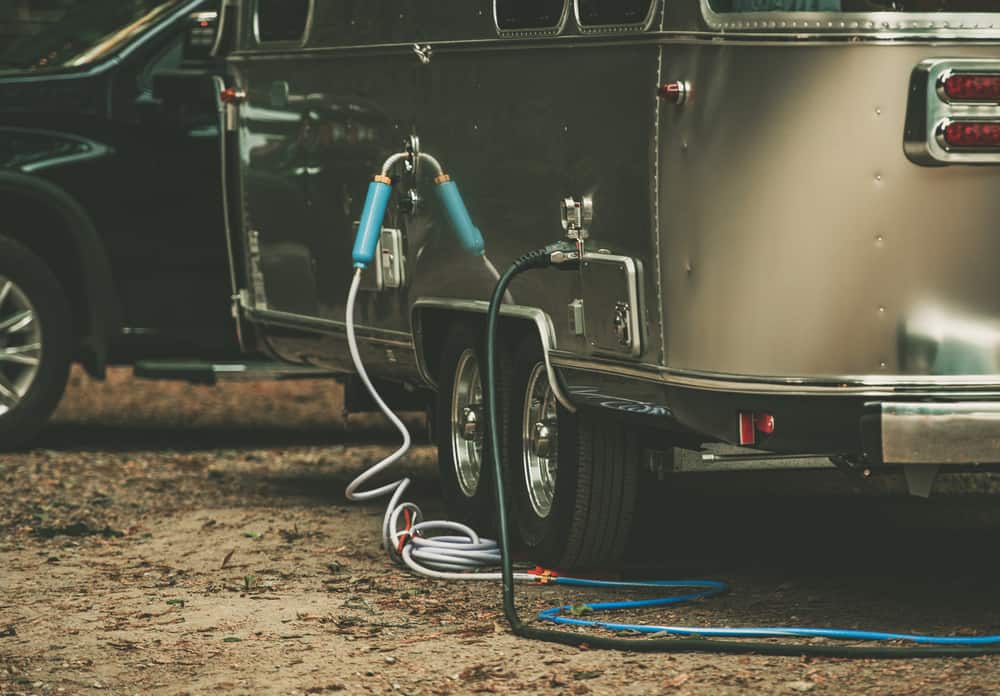
Very much like your electrical system, an RV ‘s plumbing system is designed to work whether you are hooked up to services, or not. When you are hooked up at an RV park, you will be using the local city water supply. A water hose connection delivers water directly into your pipes and provides pressure to keep it moving through your sinks, shower and toilet.
When you will not be hooked up, there will typically be a potable water tank (fresh water) which you can fill up before traveling to your final destination. There will also be a small RV water pump hooked up to this tank which runs off your 12v (battery) electrical system. This pump will then deliver water on demand from the storage tank to all of the faucets. When you open a faucet, the drop in water pressure automatically engages the pump to push water to you, so you will hear the pump run while water flows.
PRO TIP- when utilizing your RV fresh water holding tank, do not fill it up until you are close to your camping spot. That way you are not hauling hundreds of extra pounds down the highway. Less stress on your tank, AND on your engine!
Water Pressure Regulators
This is a good spot to talk about water pressure. RV’s as a rule are designed to be as light as possible for obvious reasons. So the materials that go into the construction are light as well. This also applies to the plumbing system.
While most modern RV plumbing systems are tested to 100 psi (pounds per square inch), it is strongly recommended that you not run pressure above 50 or 60 psi to keep things safe. This is a fairly normal pressure as many homes run between 40 and 60 psi anyway.
Enter the water pressure regulator. As you travel, you will find that water pressure varies greatly from place to place. Protect you investment by using a regulator. It is a simple attachment that goes on when you hook up your water supply hose and it will make sure that you do not blast your system with high pressure.
If pressure is too low in a given spot, you can simply fill up your fresh water tank and use your onboard pump to bring it up to desires pressure.
3 Types Of Water Tanks In An RV
Along with the fresh water tank described above, there are 2 other types of holding tank typically hidden in the belly of your RV. These tanks are used to catch all of the used water that goes down the drain. They are called the black tank, and the grey tank.
BLACK WATER HOLDING TANK- the black water tank is connected to your RV toilet plumbing. It catches all of your human waste and holds it until you can safely and appropriately “dump” the tank into a sewer. This wastewater tank is strictly for the RV toilets.
GREY WATER HOLDING TANK- the gray water tank catches water from the bathroom sink, kitchen sink and shower drain. It stores all of the water that goes down those drains. Again it will hold this water until you can safely “dump” it.
In most places, as long as the gray tank holds only washing water, it is legal to dump it on the ground. However, we would discourage this practice unless absolutely necessary.

Getting Hot Water In Your RV
Typically an RV with plumbing systems will have a hot water heater. This is a relatively small tank usually located in your “basement” storage area. This heater is also “dual mode” meaning it can run on either 110v electricity when you are hooked up to shore power, or it can run on your on-board propane if you are not at hookups.
This system is designed so that you always have water for hot showers, washing dishes, etc. They do also make tankless water heaters for RV’s if you choose to go that route. These run only on propane, however which means that you will always be paying for this hot water, even if you are plugged in at a campground.
Dumping The Tanks
Whether you are parked in a campground with full hookups, or boondocking in the desert, you will need to perform tank dumps. It is simply part of the RVing life. Here’s why.
Many people think that when you are hooked up to sewer, it is ok to just leave your tank valves open and let things run like in a house. This is NOT correct. When the black tank is left open, liquid waste water will continually flow out while solids will not completely leave.
Over time these solids will build up creating what is affectionately known as the “poop pyramid.” If you have ever looked into a vault toilet at your local state park, you know exactly what I am talking about.
This can be a VERY serious problem for RVers. The issue is that you will not know you have a problem until the drain gets plugged up by the growing poo mass, and then the tank fills up. A full tank gives little room for blasting water up the drain, so clearing the backlog becomes a VERY (and potantially expensive) messy proposition.
PRO TIP- Never ever, EVER do ANYTHING else while you are flushing the black tank. There is nothing worse than hearing your wife screaming and looking up to see poop water pouring out from your toilet and roof vent because you forgot to turn off the flush hose. (We’ve had that happen twice and no I’m not kidding!!!) Stay focused on this task!!!
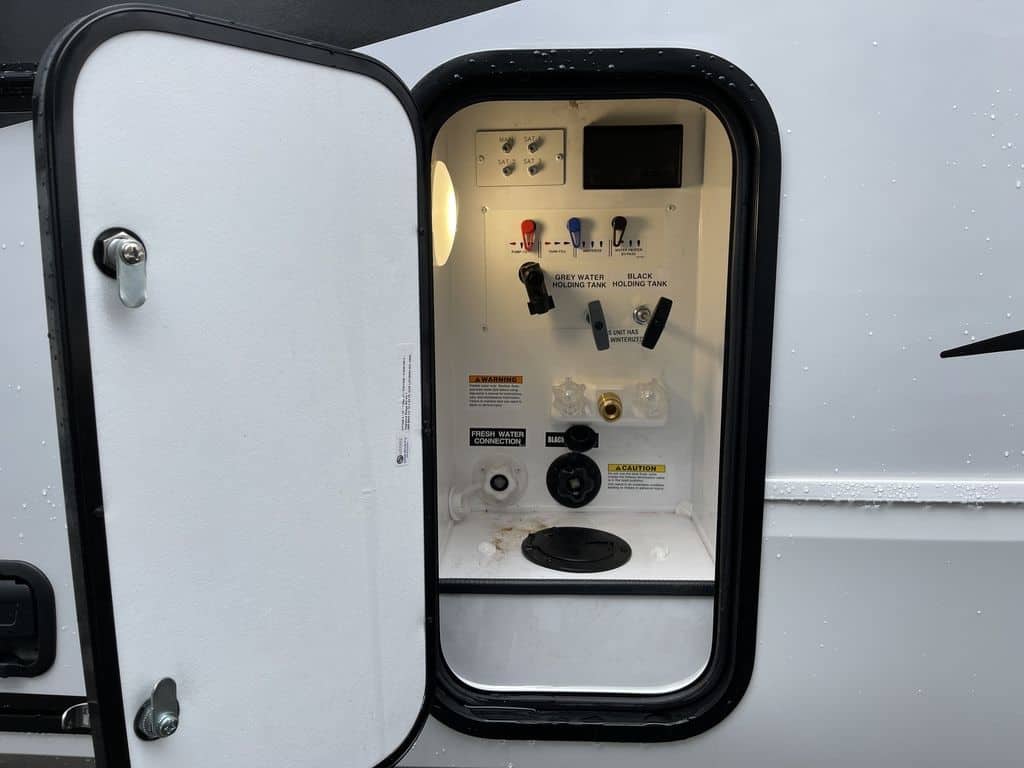
What Every RV Needs For Plumbing Hook-Ups
Putting together a set of RV necessities for the plumbing is one of the first and most basic tasks for RV living whether it be a motorhome, 5th wheel, or travel trailer. Once you get to the campground you have to hook up to water, sewer and electrical and there are just a few things you absolutely need to get the job done.
As a side note, also make sure you have the proper RV tools to utilize and maintain this system as well as on the rig. If you are not sure what RV accessories you should have, we have put together a list of our top recommended RV must haves.
There are a few plumbing related RV gadgets that are “must haves.” You need to bring water into the system or freshwater tank, and you need to dispose of the water from the gray and black tank. And you need to do all of this safely and in a sanitary manner.
SHOW ME EVERYTHING I NEED FOR MY RV PLUMBING NEEDS
Before we go any further, please make sure you have a box of disposable gloves close by so you can grab a pair anytime you need them and you will need them A LOT! While we do everything to keep the tank jobs clean, you are still dealing with poo water so best to stay safe.
Water Supply RV Necessities
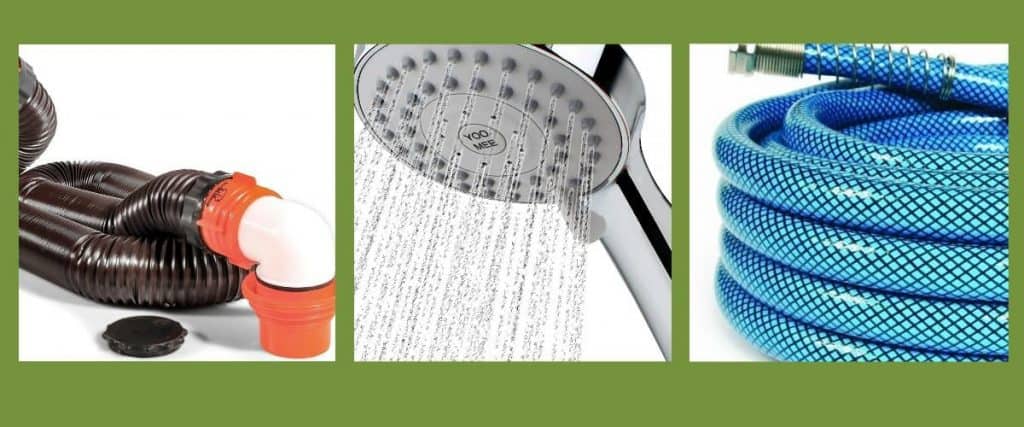
1) Water Hoses: An essential RV accessory, make sure you get one that is rated for potable water. This hose will connect from the city water connection at your campsite to the fresh water intake on your rig.

Sanitary Disposable Gloves
- These gloves have been invaluable on occasion especially when you are working with plumbing issues! I like to keep a large box of these ones as I go through them pretty fast.

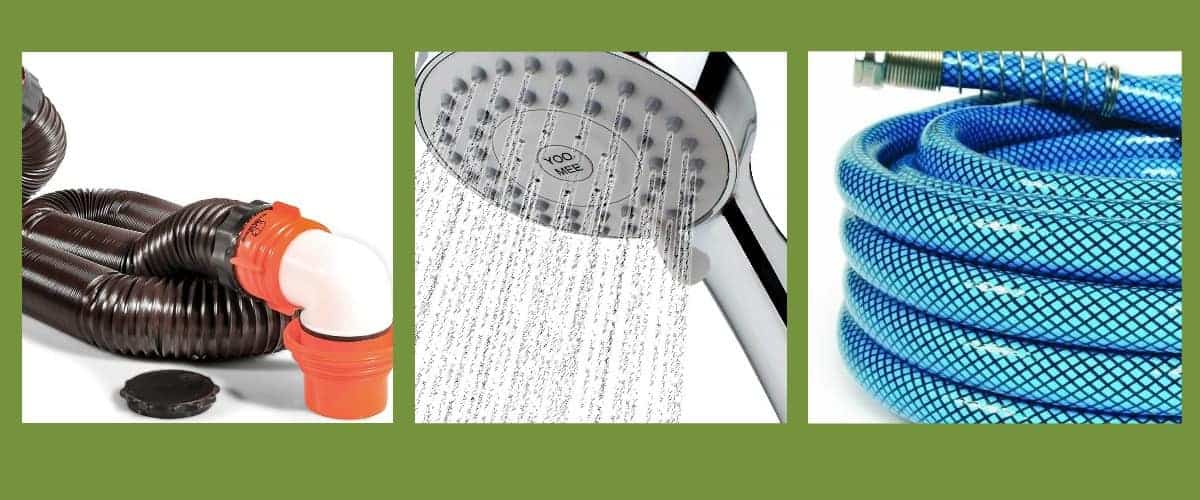
Fresh Water Hose
- Typically these are white or blue in color. These drinking water hoses are also used for filling the fresh water tank when boondocking. DO NOT use a normal garden hose!
2) Water Filter: As you move from site to site, state to state, it is difficult to know exactly how good the water quaity is. Use a water filter always, especially if you plan to use your hook ups for drinking water.

Water Filter
- A water filter is one of those RV necessities that ensure you are getting good clean water to your faucet. City water supplies vary quite a bit and some of the more rural campgrounds will have well water which is typically high in minerals.
3) Water Regulator: The same thing applies to water pressure. RV’s typically have plastic pipes and are not capable of handling as much pressure as the pipes in sticks and bricks.

Water Pressure Regulator
- So a water pressure regulator is a necessity to keep your RV plumbing safe. Regulators come in an adjustable style or non-adjustable.

Water Pressure Regulator
- This water pressure regulator is adjustable with a gauge on it so it’s easier to read.
4) Shower Head: Many times as you travel site to site, the water pressure will be less than optimal. There is nothing worse than a lousy shower so a good shower head is an RV necessity.

High Pressure Shower Head
- This shower head is specially designed to increase the pressure at the head, ensuring that you get a really good powerful shower no matter what the water pressure.
Tank Flushing RV Essentials
6) Tank Flush Hose: When dumping the black tank, it is always advisable to flush it out. Over time built up solids can cause MAJOR problems so a little bit of due diligence is in order. I back flush my tank every single time I dump- better safe than sorry.

Tank Flush Hose
- A second flush water hose is a necessity. You should never use your fresh water supply hose to flush the tank as there is always the possibility of getting bacteria (poop) into that hose. Keep them separate. A grey tank hose is usually grey in color and will be marked as such.
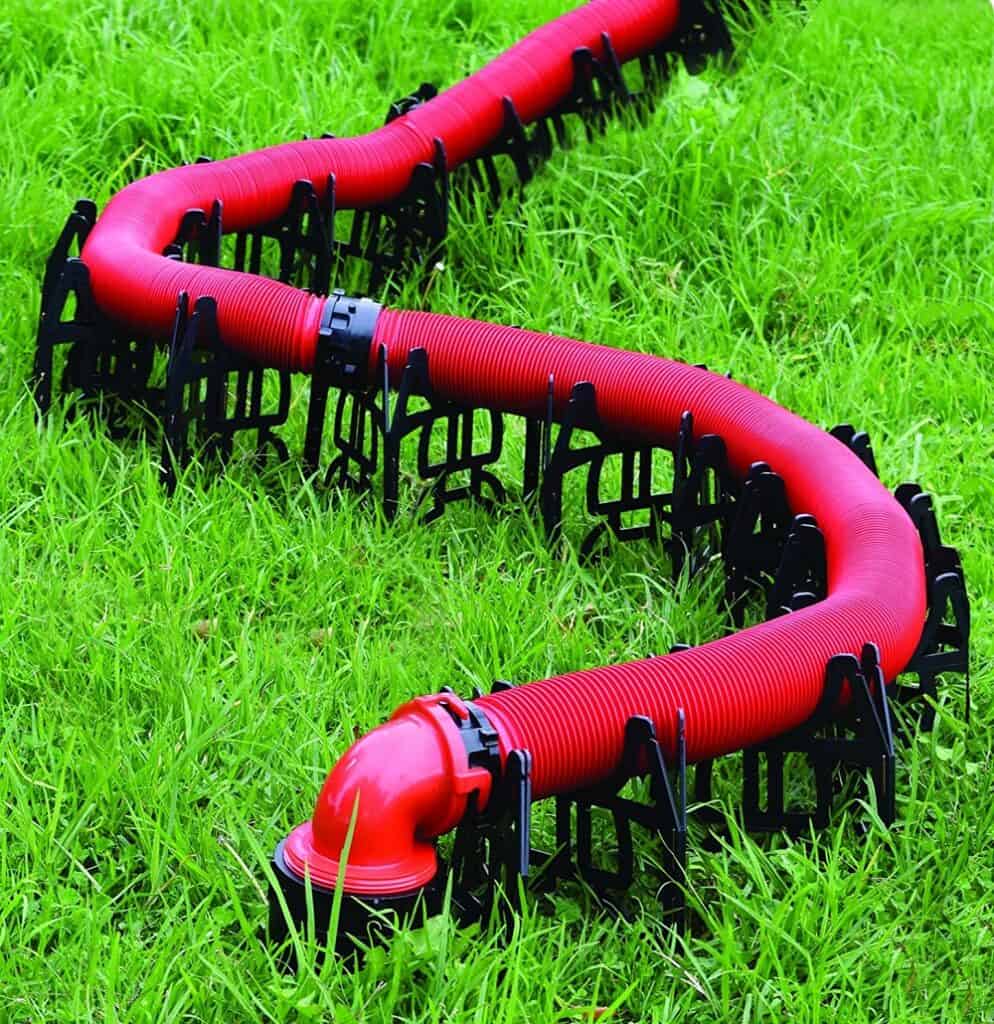
7) Sewer hose kit: this is also a must-have RV accessory. This hose is used to connect your dump valve to the sewer connection. I highly recommend anything that Camco makes, this particular kit is considered to the best RV sewer hose on the market.

Camco Sewer Drain Hose
- The kit includes the hose as well as accessories to properly (and tightly) connect each end. You don’t want a poop explosion- trust me!
8) Tank Flush Valve: If your rig is not equipped with a built-in tank flushing connection, a check valve with a flushing hookup is truly a must-have gadget. You can hook your tank flushing hose up to this valve and jet water backwards up into the tank, breaking up any solids that have not gone down the drain.

Tank Flush Valve
- I have a built-in system but I use one of these as well from time to time if things are not flowing smoothly. It can be a real life-saver. The clear plastic also allows me to see how things are flowing through the hose.
9) Toilet Paper: If you are not using septic safe toilet paper- you are playing a dangerous game. We strictly use Scotts 1000. It is a single ply but does a fine clean-up job.

Toilet Paper
- It dissolves right away in the tank and will really help keep your black tank free from an issue. Whether you are full timing or just on a weekend RV trip, proper toilet paper is a must have RV essential.
11) Clear Drain Section: Gross as this can be, it is really helpful to see how the tank is draining and when it is clean.

Clear Hose Adaptor
- Once you see how much waste is left behind and become obsessed (like the rest of us) with the need to get it all out, you’ll get over watching poop flow and a clear connection will become one of your RV essentials.
How To Properly Flush RV Tanks
“Honey, the poop tank is burping!”
Yes, RV living is the ONLY lifestyle where THAT phrase is acceptable.
Now that you have the goods on the RV plumbing necessities, let’s look at best practices for dumping your tanks.
After all, having the must-have RV accessories is only as good as their use, right? Whether hooked up or using the dump station, it is important to get your tanks flushed right to avoid problems down the road. After over 3 years on the road, we have gotten down to a pretty good system.
The first thing you want to do is to dump the black tank. We prefer to call it the poop tank because we have little kids and they think it’s funny (me too.)
Dumping the poop tank first allows you to run the relatively cleaner grey water through the hose last, cleaning it out. Always check the connections on your sewer hose to make sure they are connected properly and pointing in the right direction.
A LOT of poop comes out through that hose quickly and you don’t want to find out too late that the hose was loose- TRUST ME!
This is especially important at the dump station as it is easy for the drain end of the hose to get turned sideways spewing poop juice all over your feet! TRUST ME!
Once the tank is “empty” it is important to give it a good flushing to clear out any solids that did not make it out during the dump. Otherwise, these solids can build up over time and create a real problem.
Proper Flushing of the Poop Tank
My rig has a built in flush system. If yours is similar, you simply can hook up a Grey Water Flush Hose to flush. DO NOT use your fresh water hose for this purpose!
I wait until the tank has fully emptied on its own to turn on the flush. This ensures that any “floaters” are on the floor of the tank and can get pushed down the drain.
I then watch the clear elbow (RV must-have) in my waste line to see what comes out. It is always surprising to see how much is left behind when you think the tank is empty.
I will run the flush until the water runs relatively clear and then turn it off, allowing the tank to drain again. Then I repeat the process until there is no more solid waste to be found.
A LOT of poop comes out through that hose quickly and you don’t want to find out too late that the hose was loose – TRUST ME!
Every couple of dumps I will fill the tank a couple of times with clear water using the flush system and drain it just to make sure it is getting cleaned out well. This is a dangerous process as it takes a few minutes and it is easy to get distracted. DO NOT GET DISTRACTED!!!
There is nothing worse than hearing your wife screaming and looking up to see poop water pouring out from your roof vent because you forgot to turn off the flush hose. (We’ve had that happen twice and not I’m not kidding!!!)
Even though I use a hose splitter to hook up both hoses, I religiously disconnect the flush hose after each use. That way I can always see if I have forgotten something.
Once the flushing is done, let the flush hose run water into your tank for about 30 seconds to a minute. That way you start the new tank with a bit of water in the bottom. Then add a little bit of Rid-X into all of the tanks to keep them stink free. It doesn’t take a lot – one box should last a couple of months.
While these are just some of the basics, there is nothing worse than having water or tank problems on your RV camping trips. These RV essentials and practices will help make sure your next excursion “flows freely.” Sorry, not sorry!
Did we miss anything on the list? If so please share below in the comments.
Water System Maintenance And Repairs
As with any system in your rig, there will be occasional repairs or maintenance to be done. Having a bit of knowledge will help you quite a bit when those times come.
Accessing The Plumbing In Your Rig
Access to the plumbing in RVs varies with each model. Usually most of the pipes can be found below the bathroom and kitchen areas. Typically the tanks are buried deep within the bowels and cannot be reached without a good bit or work.
Most of the water pipes in your RV are called PEX tubing. It is a special flexible pipe that is good for the moving and shaking environment of an RV. The connections are made with crimping rings so it is a good idea to have a repair kit handy for this pipe.

PEX Repair Crimping Tool
- Make PEX connections from 3/8″ to 1″.
- The ratchet design and self-release mechanism will make the cinch easy.
- Catch and repair leaks quickly, run new water lines for your needs.
Winterizing Your Plumbing
When storing your camper during the winter months, it is very important to winterize the plumbing system which basically means to remove all water from the system and fill the pipes with anti-freeze. If water is left in the pipes, it can expand when freezing, splitting the pipes open.
There are several methods for winterizing the pipes, depending on how your particular rig is set up. Consult your owners information, or look for You Tube videos explaining the process for your type of RV to get exact instructions.
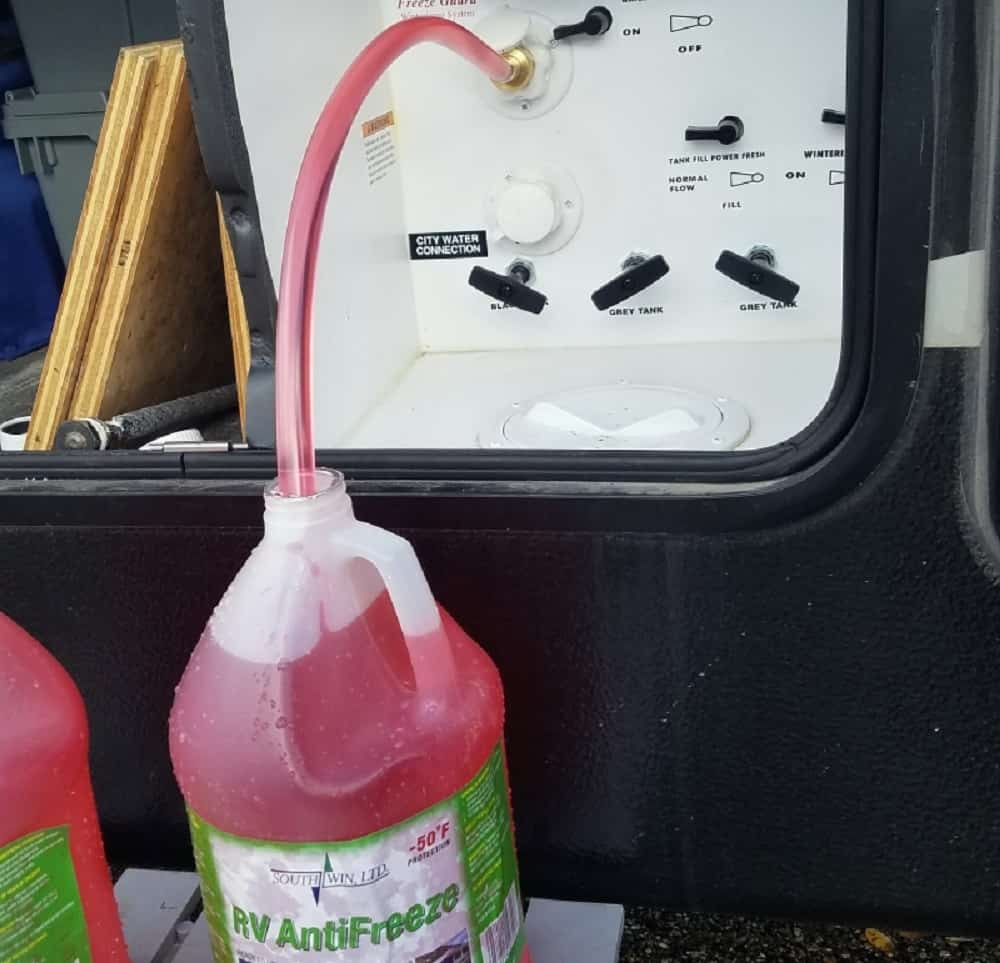
The process usually will involve connecting a tube to your water intake, and using the water pump to siphon water into the pipes. You will typically start at the closest valve to the intake, opening the valve until the antifreeze runs through, then shutting the valve and moving to the next closest, until you have done them all.
One important thing to always remember is that you must drain all of the water from your rv water heater, and then ELIMINATE the hot water heater from the antifreeze refill. You do not want antifreeze in your HWH because it is very difficult to completely remove. Any rig with a HWH will have a way to isolate it from the refilling process.
ALSO- make sure to use RV/Marine grade antifreeze. Automobile antifreeze IS NOT SAFE for this operation and should NEVER be used!

RV Pump Conversion Kit
- If your RV is not set up for winterizing, this simple kit will adapt your pump to do the job.
- Comes complete with brass valve, siphon hose, Teflon tape and pump adapters (pump not included.)
- Permanent, one-time installation.

RV Water System Antifreeze
- Safe and reliable for all RV water pipes when winterizing.
- Formulated for -50 degree F burst protection.
- Safe for incidental contact with people, pets, and wildlife. Readily biodegradable and non-toxic to aquatic life.
RV Plumbing System Basics
There you have the basics on understanding your RV water system. Hopefully, you will have the knowledge you need to have a relaxed time on your next camping trip. Whether you are hooking up in RV parks, or dry camping out in the back country, having a good water system is critical to having a good time on the road. Let us know in the comments if you have any questions regarding your own rig.

Frank Foley
Frank is the Head Hubby, Daddy, and Fix-It Guy of the Roving Foleys clan. He ia an avid traveler and has spent over 5 years traveling full time with his family. he loves helping others learn about the RV life. He has also traveled in Europe, Asia, and Australia with his wife Grainne.
Very helpful. Now I think I know why our toilet smells horribly after it is flushed. I can only imagine what the inside looks like.